
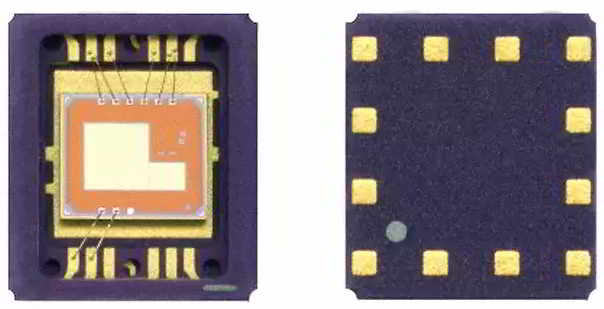
ماژول ML8511 یک هدر برد سنسور ML8511 می باشد . این سنسور قابلیت اندازه گیری UV را دارد . اموج فرابنفش یا به اختصار UV سیگنال هایی با طول موج 10 تا 400 نانومتر می باشند که طول موج های بالای آن به سختی قابل روئیت می باشد اما در کل امواج فرابنفش مرئی نیستند . امواج UV کاربرد های بسیار گسترده ای دارند به طور مثال در ساخت PCB از UV جهت تثبیت و خشک کردن سولدر ماسک ها استفاده می شود . قرار گرفتن در معرض فرابنفش با شدت زیاد می تواند خطراتی همچون سرطان پوست یا مشکلات چشمی را به همراه داشته باشد . استفاده از سنسور هایی مانند ML8511 در گجت های پرتابل و همراه مانند موبایل ها می تواند ایده خوبی جهت پیشگیری از خطرات UV برای بدن باشد . از این سنسور می توانید در کاربرد هایی مانند گلخانه های ، خشک کردن چسب ها و… استفاده کنید . سنسور ML8511 دارای یک آمپلی فایر داخلی جهت تقویت سیگنال خروجی می باشد که امکان اتصال مستقیم خروجی آن به ADCمیکروکنترلر ها وجود دارد .
در تصویر زیر پایه های ماژول ML8511 نشان داده شده است :
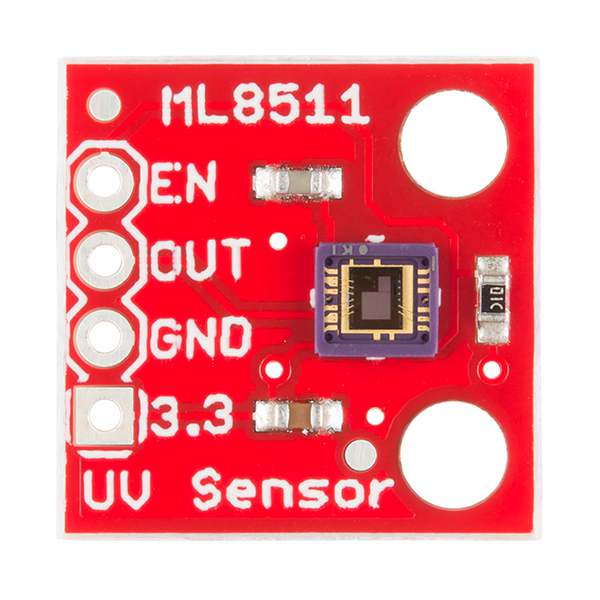
پین EN جهت فعال سازی ماژول می باشد .
OUT سیگنال خروجی ماژول است .
3.3 و GND پین های تغذیه ماژول می باشد .
راه اندازی ماژول ML8511 با آردوینو :
برای راه اندازی این ماژول باید پین خروی آن را به یکی از پین های A0 تا A5 برد ادروینو متصل کنید .

کد های زیر را بر روی برد خود پروگرام و سپس Serial monitor آردوینو IDE را باز کنید .
    /*
 ML8511 UV Sensor Read Example
 By: Nathan Seidle
 SparkFun Electronics
 Date: January 15th, 2014
 License: This code is public domain but you buy me a beer if you use this and we meet someday (Beerware license).

 The ML8511 UV Sensor outputs an analog signal in relation to the amount of UV light it detects.

 Connect the following ML8511 breakout board to Arduino:
 3.3V = 3.3V
 OUT = A0
 GND = GND
 EN = 3.3V
 3.3V = A1
 These last two connections are a little different. Connect the EN pin on the breakout to 3.3V on the breakout.
 This will enable the output. Also connect the 3.3V pin of the breakout to Arduino pin 1.

 This example uses a neat trick. Analog to digital conversions rely completely on VCC. We assume
 this is 5V but if the board is powered from USB this may be as high as 5.25V or as low as 4.75V:
 http://en.wikipedia.org/wiki/USB#Power Because of this unknown window it makes the ADC fairly inaccurate
 in most cases. To fix this, we use the very accurate onboard 3.3V reference (accurate within 1%). So by doing an
 ADC on the 3.3V pin (A1) and then comparing this against the reading from the sensor we can extrapolate
 a true-to-life reading no matter what VIN is (as long as it's above 3.4V).

 Test your sensor by shining daylight or a UV LED: https://www.sparkfun.com/products/8662

 This sensor detects 280-390nm light most effectively. This is categorized as part of the UVB (burning rays)
 spectrum and most of the UVA (tanning rays) spectrum.

 There's lots of good UV radiation reading out there:
 http://www.ccohs.ca/oshanswers/phys_agents/ultravioletradiation.html
 https://www.iuva.org/uv-faqs

*/

//Hardware pin definitions
int UVOUT = A0; //Output from the sensor
int REF_3V3 = A1; //3.3V power on the Arduino board

void setup()
{
  Serial.begin(9600);

  pinMode(UVOUT, INPUT);
  pinMode(REF_3V3, INPUT);

  Serial.println("ML8511 example");
}

void loop()
{
  int uvLevel = averageAnalogRead(UVOUT);
  int refLevel = averageAnalogRead(REF_3V3);

  //Use the 3.3V power pin as a reference to get a very accurate output value from sensor
  float outputVoltage = 3.3 / refLevel * uvLevel;

  float uvIntensity = mapfloat(outputVoltage, 0.99, 2.8, 0.0, 15.0); //Convert the voltage to a UV intensity level

  Serial.print("output: ");
  Serial.print(refLevel);

  Serial.print("ML8511 output: ");
  Serial.print(uvLevel);

  Serial.print(" / ML8511 voltage: ");
  Serial.print(outputVoltage);

  Serial.print(" / UV Intensity (mW/cm^2): ");
  Serial.print(uvIntensity);

  Serial.println();

  delay(100);
}

//Takes an average of readings on a given pin
//Returns the average
int averageAnalogRead(int pinToRead)
{
  byte numberOfReadings = 8;
  unsigned int runningValue = 0;

  for(int x = 0 ; x < numberOfReadings ; x++)
    runningValue += analogRead(pinToRead);
  runningValue /= numberOfReadings;

  return(runningValue);
}

//The Arduino Map function but for floats
//From: http://forum.arduino.cc/index.php?topic=3922.0
float mapfloat(float x, float in_min, float in_max, float out_min, float out_max)
{
  return (x - in_min) * (out_max - out_min) / (in_max - in_min) + out_min;
}